Swagger
RESTful API 설계 및 문서화에 사용되는 오픈 소스 프레임워크
- API의 구조 시각화 및 자동화된 문서 생성
- API 기능을 테스트할 수 있는 UI를 제공
- JSON 형식으로 API 문서를 작성하는 데 유용
- 다양한 언어와 프레임워크 지원
Swagger 사용의 이점
- 효율적인 문서화:
Swagger를 사용하면 API 문서를 자동으로 생성할 수 있어, 문서화 작업에 소요되는 시간을 크게 줄일 수 있습니다.
- 테스트 용이성:
Swagger UI를 통해 API의 각 엔드포인트를 쉽게 테스트할 수 있어, 개발자와 QA 팀의 협업이 원활해집니다.
- 개발자 친화성:
-Swagger는 구조화된 문서 형식을 제공하여 API의 사용법을 쉽게 이해할 수 있도록 돕습니다.
- 다양한 언어 지원:
Swagger는 다양한 프로그래밍 언어와 프레임워크에서 사용할 수 있어, 팀의 기술 스택에 구애받지 않습니다.
Swagger 시작하기
Swagger 스펙 작성: YAML 또는 JSON 형식으로 API의 엔드포인트, 요청 및 응답 형식을 정의합니다.
Swagger UI 설정: Swagger UI를 설치하고, 작성한 스펙 파일을 연결하여 웹 인터페이스를 생성합니다.
테스트 및 배포: Swagger UI에서 API를 테스트하고, 필요에 따라 API를 수정한 후 배포합니다.
1. Spring 프로젝트 생성

2. 의존성 추가
springdoc-openapi-starter-webmvc-ui
https://mvnrepository.com/artifact/org.springdoc/springdoc-openapi-starter-webmvc-ui
- 런타임에 애플리케이션을 분석하여 JSON/YAML/HTML 형식의 API를 자동으로 생성
- swagger-annotations와 swagger-ui 공식 라이브러리에 의존

3.
http://localhost:8080/swagger-ui/index.html 접속해서 swagger UI에 정상적으로 연결 되는지 확인

4.
API 작성
4-1.
API 공통 응답 포맷 정의 클래스 작성
package com.zz.swaggersample;

import lombok.Getter;
import lombok.RequiredArgsConstructor;

@Getter
@RequiredArgsConstructor
public class CommonResponse<T> {

	private final int code;
	private final String message;
	private final T data;

	public static <T> CommonResponse<T> success(T data) {
		return new CommonResponse<>(Result.OK.getCode(), Result.OK.getMessage(), data);
	}

	public static <T> CommonResponse<T> success() {
		return new CommonResponse<>(Result.OK.getCode(), Result.OK.getMessage(), null);
	}

}
4-2.
Result Enum 클래스
package com.zz.swaggersample;

import lombok.Getter;
import lombok.RequiredArgsConstructor;

@Getter
@RequiredArgsConstructor
public enum Result {

	OK(1, "성공"),
	FAIL(-1, "실패");

	private final int code;
	private final String message;
}
4-3.
API 작성
package com.zz.swaggersample.controller;

import org.springframework.web.bind.annotation.PathVariable;
import org.springframework.web.bind.annotation.PostMapping;
import org.springframework.web.bind.annotation.RestController;

import com.zz.swaggersample.CommonResponse;
import com.zz.swaggersample.UserDTO;

import io.swagger.v3.oas.annotations.Operation;
import io.swagger.v3.oas.annotations.parameters.RequestBody;
import io.swagger.v3.oas.annotations.responses.ApiResponse;
import io.swagger.v3.oas.annotations.responses.ApiResponses;

@RestController
public class SampleController {

	@PostMapping("/register/{membership}")
	@Operation(summary = "회원 등록", description = "회원 등록 메서드 입니다.")
    @ApiResponses(value = {
            @ApiResponse(responseCode = "200", description = "회원 등록 성공"),
            @ApiResponse(responseCode = "400", description = "잘못된 요청")
    })
	public CommonResponse<String> registerUser(@PathVariable String membership
															, @RequestBody UserDTO user){

		// 회원 등록 로직

		return CommonResponse.success();
	}

}
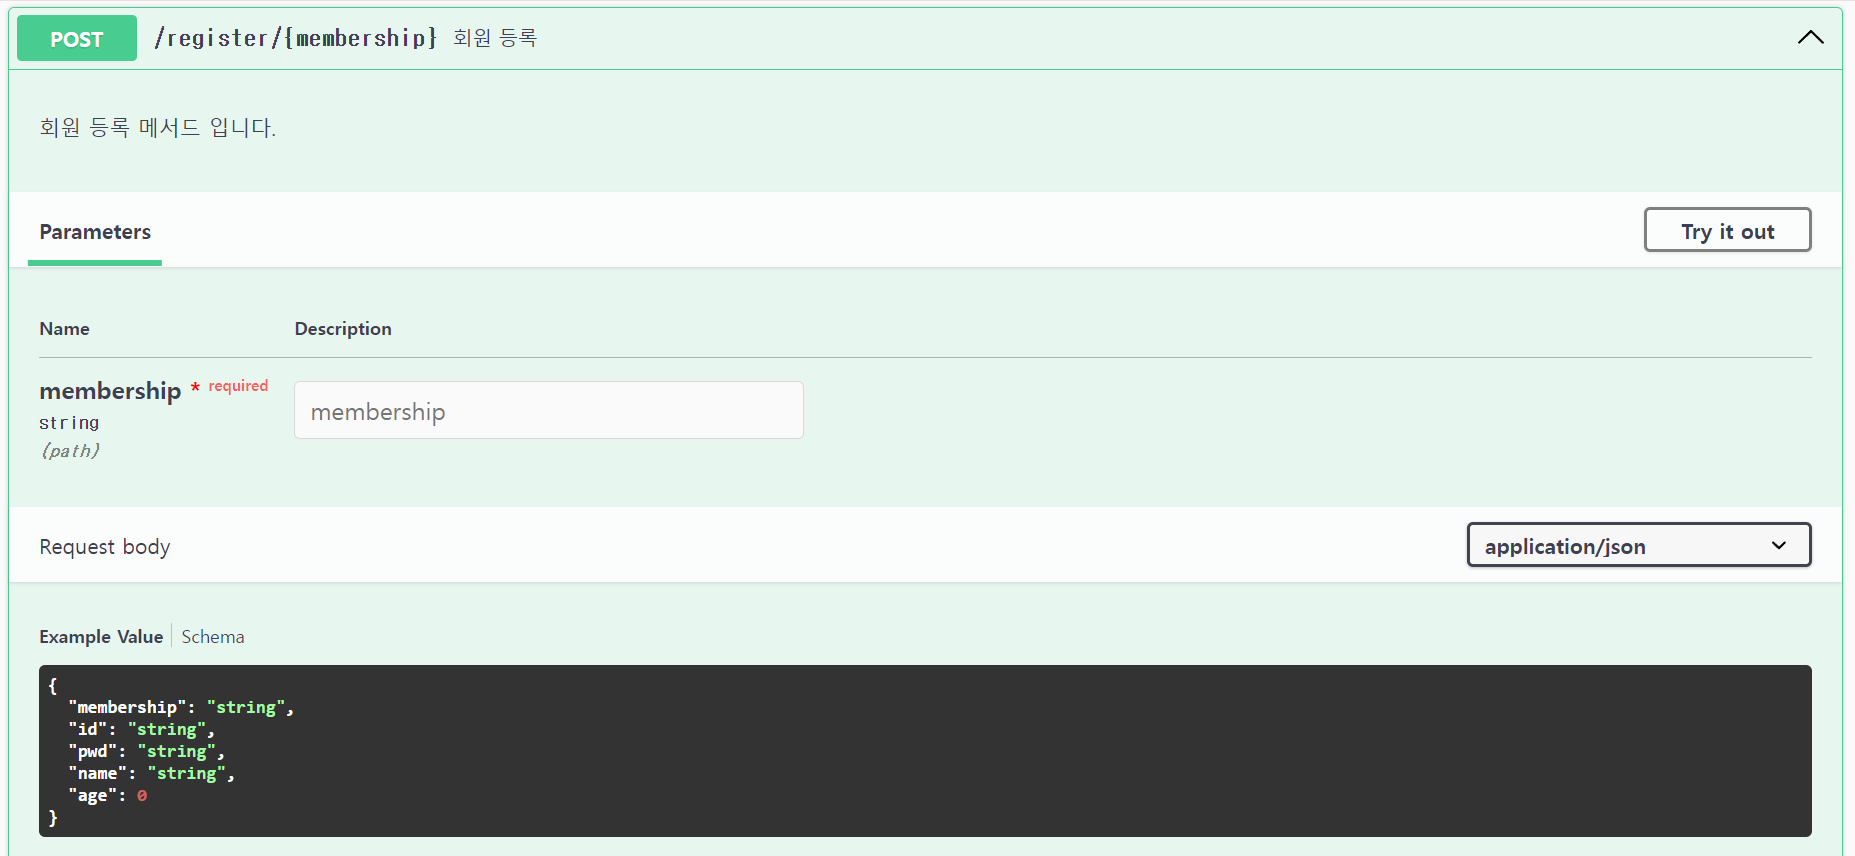
5.
swagger UI 접속
http://localhost:8080/swagger-ui/index.html#/sample-controller/registerUser


Swagger는 현대의 API 개발에 있어 필수적인 도구로 자리 잡고 있습니다.
효율적인 문서화, 손쉬운 테스트, 그리고 다양한 언어 지원 덕분에 개발자들은 더 나은 API를 설계하고 관리할 수 있습니다. API 개발에 Swagger를 도입해 보세요. 여러분의 개발 과정에 많은 도움이 될 것입니다.
> Reference
'Back' 카테고리의 다른 글
| PgBouncer 설치 및 사용 방법 (0) | 2024.11.18 |
|---|---|
| 오라클 버추얼박스(Oracle VirtualBox) 설치 및 사용 방법 (0) | 2024.11.01 |
| Observer Pattern과 알림 시스템 (0) | 2024.07.05 |
| Trie 구조 (0) | 2024.03.25 |
| 시스템 명령어로 도커 컨테이너의 리소스 사용 정보 구하기 (0) | 2024.02.28 |


